
CLICK HERE to see detailed pics and info I am archiving about Valco / Supro / National "string-thru" aka "bunker" pickups. These pickups are extremely delicate when the pickup cover is removed and during disassembly and working on them; Good for folks to have insights before intrusions ! |
See Next Page; Donor Electronics Assembly >>> |
~ 1948 Supro Lap Steel Refurbishment ~ Page 6; Pickup Testing & Troubleshooting: |


See Next Page; Donor Electronics Assembly >>> |
CLICK HERE to see detailed pics and info I am archiving about Valco / Supro / National "string-thru" aka "bunker" pickups. These pickups are extremely delicate when the pickup cover is removed and during disassembly and working on them; Good for folks to have insights before intrusions ! |
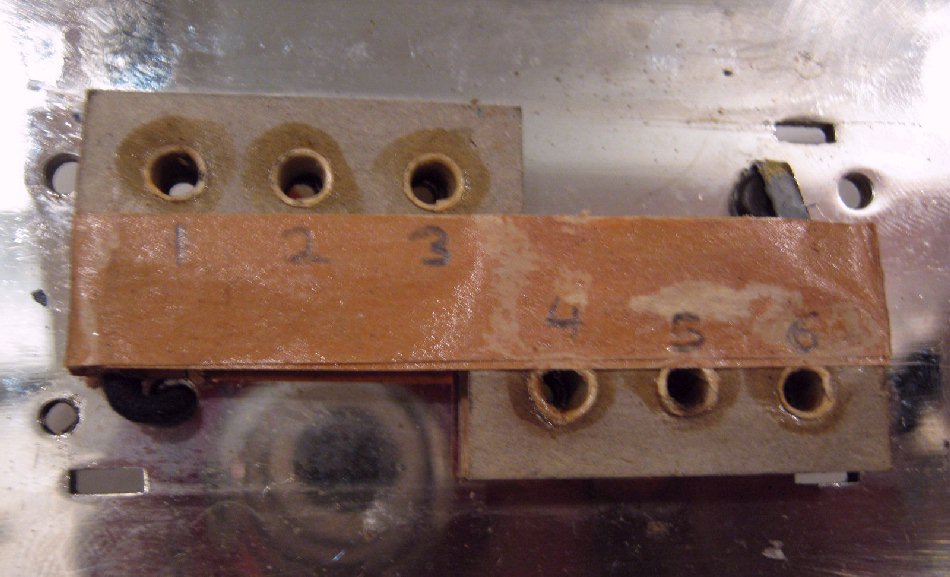
Here we see one of the two coils. The other coil couldn't be repaired; It had an intermittent break in the coil wire down inside. The 4 pieces below the intact coil are one of the coil casing's paper plates and the 3 tubes that protect the coil from the pole pieces / screws. The paper plate is actually thin cardboard salvaged from some other printed stock, dipped in a thin hot wax that reinforces the paper plate and serves as a "glue" to assemble the paper plates and tubes. The paper plates are about as thick and about the same consistency as a legal pad's cardboard back. The tubes are actually waxed paper drinking straws ...the common drinking straws back then ! The coil wire is not wound around the tubes, as evidenced by clearance between the inner coil and the tubes; Which indicates that the coil is wound around an armature cuff on the winder, then one of the paper pickup plates with tubes attached is inserted into the finished coil on the winding cuff, the coil with plate and tubes removed from the cuff and then the plate for the other side is pressed on and the coil wrapped with narrow paper tape. Leads are then soldered to the coil ends. Then the two coils joining leads are soldered together and the two coil assemblies are wrapped with masking tape to hold them together square. THEN the coils assembly is dipped in melted thin wax to seal it all up and hold it all together. The coil itself is not wax potted ! You can see the perimeter of the wax around the tube holes in the blank plate interior surface shown below. |
With the tone pot removed, continuity and resistance is measured between the volume pot's lugs and the pickup's grounding screw on the electronics plate. The volume pot resistance is read with the knob / shaft in several positions of it's travel, as well as watching the meter needle swing and values through several sweeps of the pots knobs throw. Below we see the pot reading it's correct 250K by the pot mounted and grounded to the electronics plate which is case ground. |
> |
> |
< |
< |
V |
V |
V |
V |
V |
V |
DISPOSITION: Since these Supro parts are quite hard to find, and would take some time to do so; I am installing the electronics assembly from my own personal Supro lap steel onto this Supro; Mine is just like this one and in Excellent condition. I will then repair the faulty electronics assembly when parts can be found and put it on my Supro. ------------ oOo ------------ |
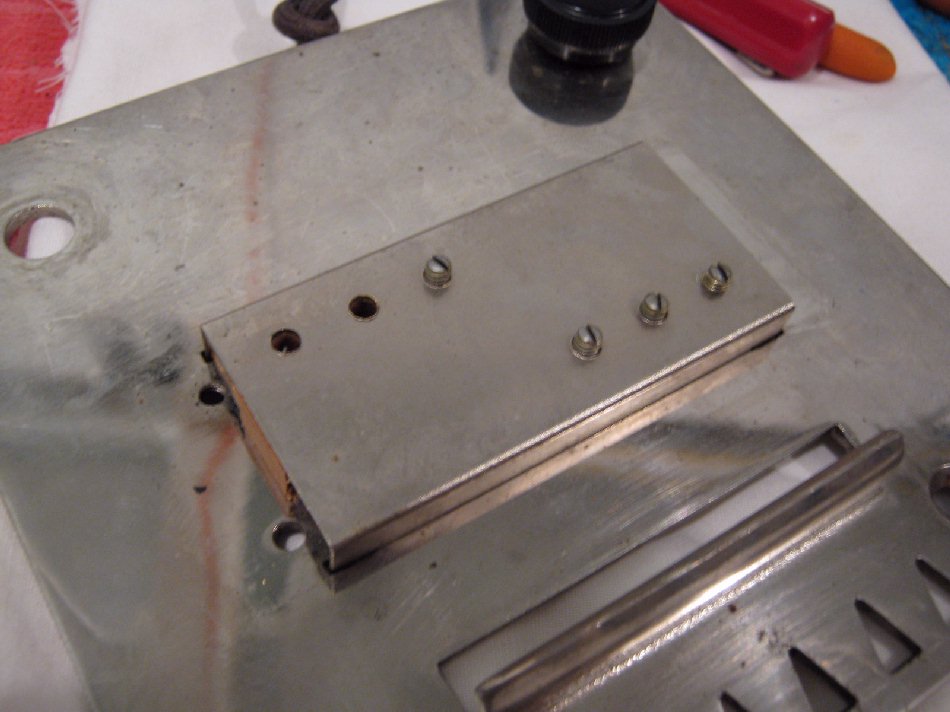
The back of the pole screws shown below is the place to place a single drop of oil whenever you are inside of a Valco / Supro, or every few years or-so; It keeps the pole screws free from sticking to the electronics plate by dissimular metal electrolysis; And the screwdrive slots in these pole screws WILL snap off if too much pressure is put on them. If you ever have to free Valco / Supro pole screws from the electronics plate, then put a drop of catalytic oil on the back of each screw and let it sit for about 10 minutes, tapping the back of the screw with a screwdriver handle several times during that soak; Then use a screwdriver that fits nice and snug on the screw heads and gently rock very moderate pressure back and forth on the screw until it is completely out of the plate's threads, ....running the screw in and out, farther each time to distribute the oil and clean the threads as you remove the screws in this fashion. To remove the pickup cover leave the screws in; The screws will keep the cover lined up and not damage the coils while you are bending the cover's securing tabs. Then slowly bend the cover tabs up with a stout jewelers flat-head screwdriver; The tabs can break if you go too fast. See further below for how to lever the cover up. |
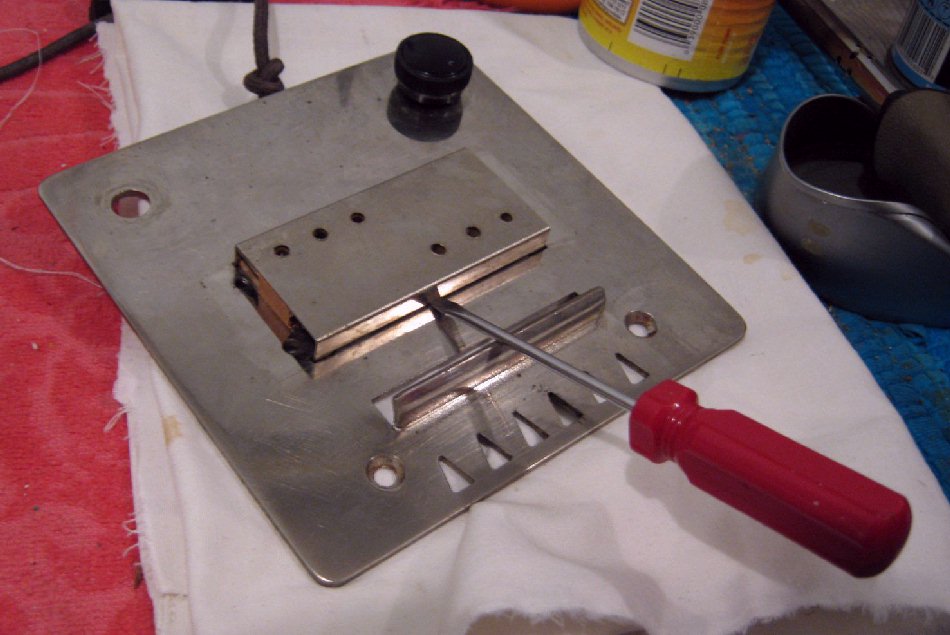
When ready to lift the cover, remove the pole screws slowly so to not strip the delicate screwdriver slots and be able to feel any resistance that might do so while removing the screws. See the image below this one for how to lever the cover up with a small screwdriver: |
The coils are most often stuck to either the cover or the electronics plate or bothh. CAREFULLY and GENTLY use a small screwdriver or thicker feeler gauge blade to insert between the coil assemblies and lightly TEASE-pry the coil assemblies wax loose from the cover or plate. That screwed-down lug is the ground point where a VERY DELICATE lead wire is soldered to the lug. |
Remember we're lifting the plate, not the coil assembly. |