Top Views From Bass Bout angle. And a side page: Backside Views. Top Treble Bout Angles and Neck Views. BLANK. Disassembled and Layout Preparation Views. Pickups / Electronics Harness Views. Pickup and Rocker Switch Internal Details. Schematic and circuit logic. And a side page: More views of electronics, Neck, Headstock and Truss Rod access. Truss rod access screw hole repair. Preliminary Assembly 1. Preliminary Assembly 2. Neck Joint screw holes refurbish. Neck pocket gauged and planed. Taping, masking and touch-up painting inside of cutaway horns. Noteworthy work in reassembly & set-up. Guitar Finished Work needed / suggested, work done, work I will do. ll Homepage ll Inventory Index ll |

Kawai / Teisco 4 "nuclear" Teisco pickups; 6 Rocker Switches; Sophisticated circuit. Pictures and info 7-23-08 ~~~ Taping, masking and touch-up spray matching the cutaways work ~~~ |
In touching up the paint on the repairs of the previously installed lefty strap button, and the correct strap button, and lip of the refined neck pocket work; The guitar's cutaways had to be taped off, spot sprayed to match the guitar's paint. This had to be done in ever-larger overlapping layers. ~~~~~~~ And of course overspray onto the work area was a factor in compounding and polishing it all back down to best match the guitar's surrounding original finish; And that work is shown on the next page. |
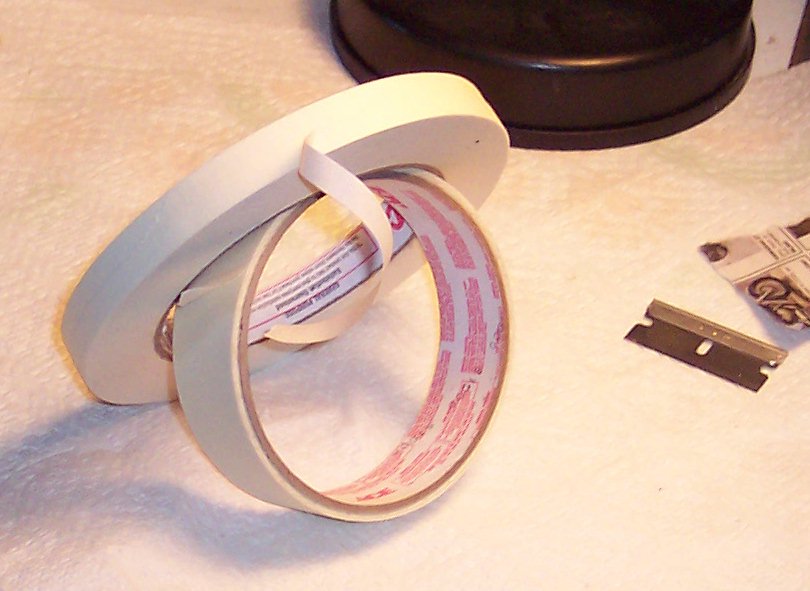
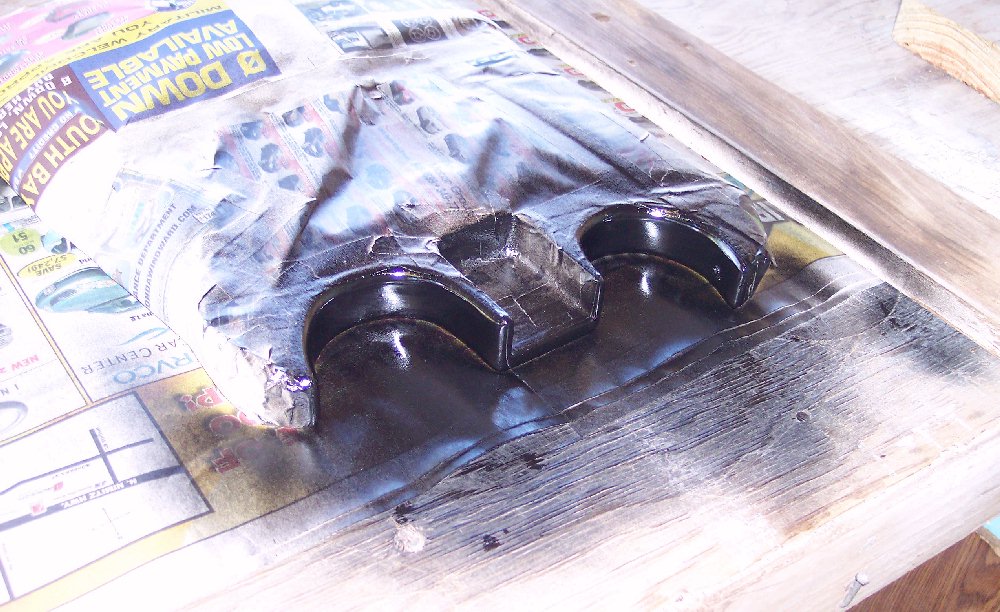
Narrow masking tape can be further split down it's center for several layers with a fresh single edge razor blade (enough layers to tape this guitar's entire cutaways perimeter twice), making narrow tape that will make nice, tight smoothe curves when slightly stretched during the tape guiding / pressing. See next picture of taped curves. |
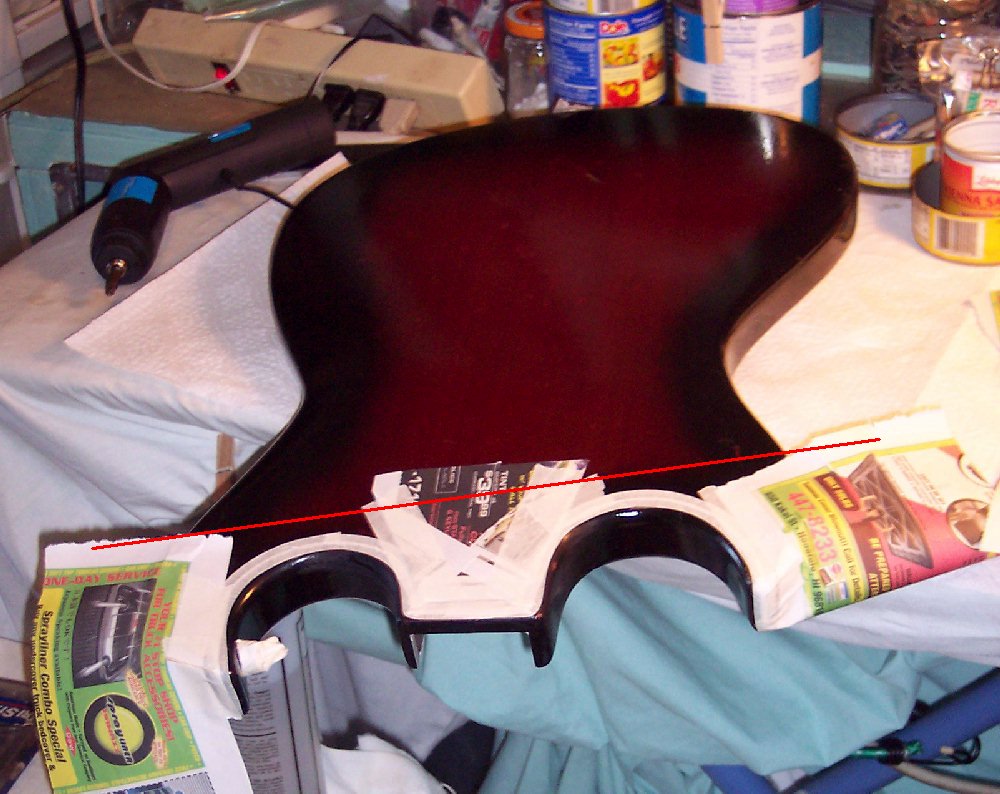
Here is the tape running on the curves and then re-run overlapped to double the width which makes masking off the work much easier. Tricks to running perfect curves with tape can be found in automotive custom paint books. You can also see here how small pieces of double folded paper is masked into the tight spots over the curved tape; Then straighter / larger masking can be done over the remaining guitar as the red line shows where straight / mass masking can begin. |
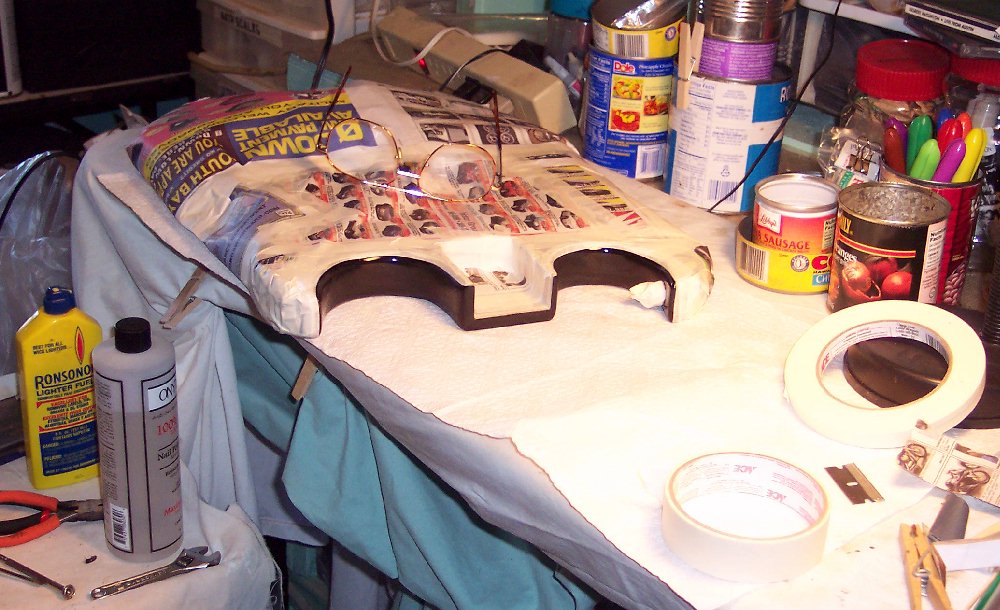
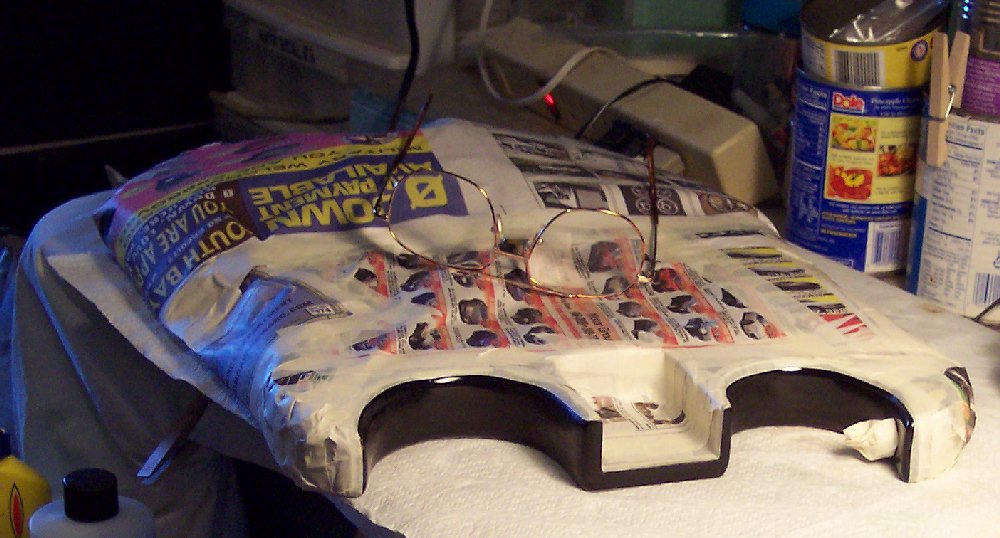
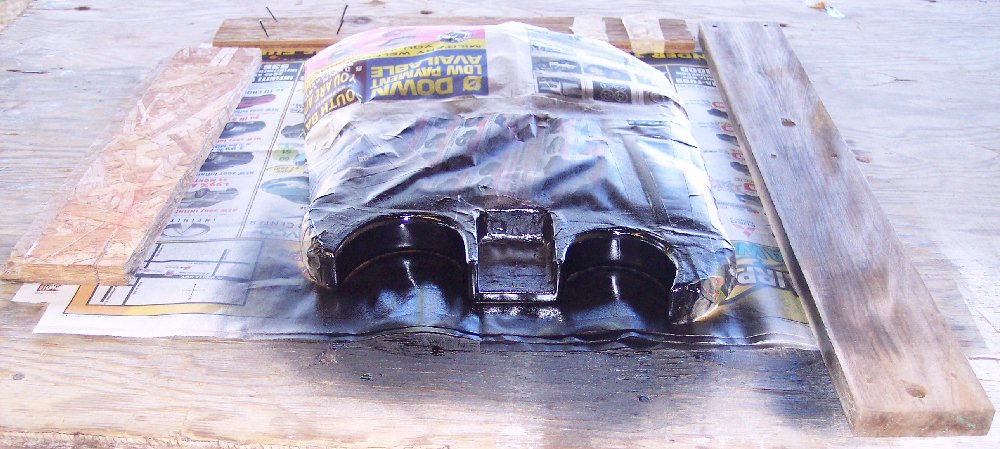
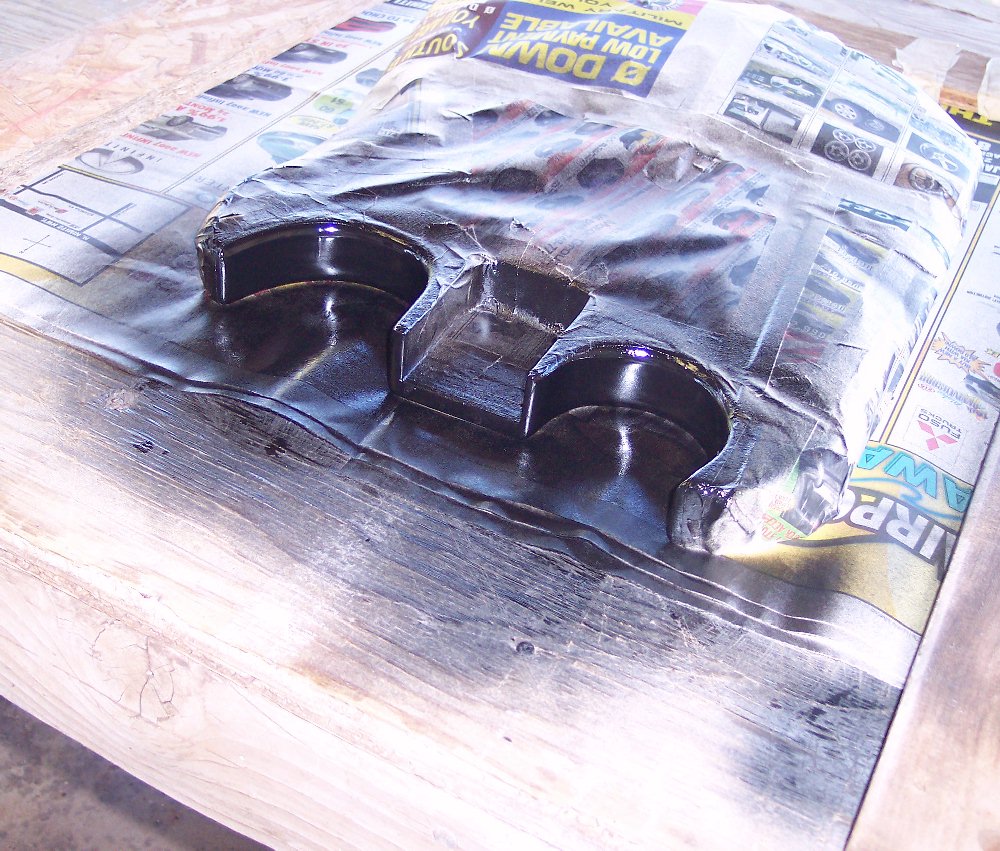
All masked off and ready for a black light inspection. Notice how the straighter / larger / mass masking is done behind the tighter masking around the cutaways. The masked-off strap button was removed prior to touch-up painting. |
A black light inspection is to get a good look and refreshed reminder of the spots that must be touched up with the paint, and how to lay & layer the paint for the best compounding job to match the surrounding original paint, and to make sure there are no cracks or other debree that the paint would not stick to. Making hand written notes and diagrams will help in remembering where the touch up spots are and how to layer each coat of touch-up paint. The black light is invaluable in allot of guitars work, to see things our eyes cannot see in normal light. It is also used by guitar Collectors, Buyers and Brokers to inspect a guitar for it's history of repairs that can't be seen with the naked eye. |
In the following pics we can see why it is imperative to mask off a guitar even for touch ups, to keep overspray off of the areas not being worked on. And of course the surronding work area must be brushed off and vacuumed to make sure there is no dust nor debree that the air brush / spray gun will blow up onto the work being done. |
Paint is cured under heat lamp 1 day, then tape and masking is removed and the paint cured under the heat lamp for another day. Then the work is compounded down to match the guitar's original surrounding finish. See more pictures of the finished compounding work on the next page. Notice: A paint repair's color, sheen, texture, aging, etc. can never be matched perfectly (voila the black light trick to see old repairs). So if a person desires an old guitar's many blemishes to be best hidden and best matched, then NON-SILICONE guitar polish will do wonders. I personally use Ace Hardware Lube-E light oil to polish guitars. It is completely innocuous to CURED paint / finishes and plastics, and is actually good for old finishes and plastics and does a good job of protecting metals from corrosions. Apply the oil to a soft cotton rag or paper towel and apply, wiping it off after application; A very thin film will remain as it should. See page 17's note about how well the oil covered up a spot on this guitar where it's clear coat had long ago lifted off; Completely invisible with the oil polishing. |
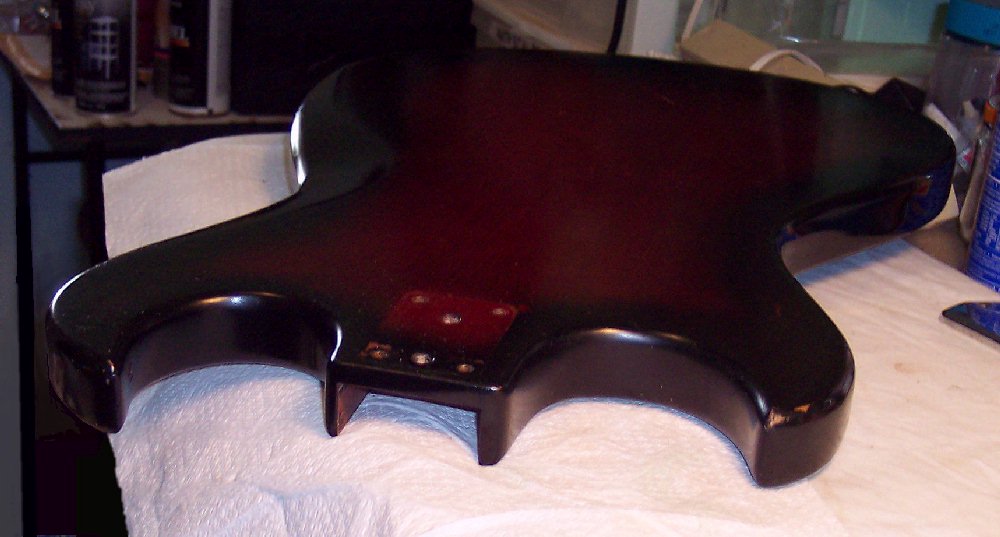
Here is the area where the old non-original added lefty strap button used to be. Now the camera's extreme sensitivity can't even see it. Here are the neck pocket lips that got repainted where they roll into the pocket. When the paint is cured under the heat lamp and the tape is removed; The tape leaves a noticeable sharp paint build-up line that must be fine-sanded down and compounded into the surrounding new and old finish. |
V |
V |
< |
> |
Top Views From Bass Bout angle. And a side page: Backside Views. Top Treble Bout Angles and Neck Views. BLANK. Disassembled and Layout Preparation Views. Pickups / Electronics Harness Views. Pickup and Rocker Switch Internal Details. Schematic and circuit logic. And a side page: More views of electronics, Neck, Headstock and Truss Rod access. Truss rod access screw hole repair. Preliminary Assembly 1. Preliminary Assembly 2. Neck Joint screw holes refurbish. Neck pocket gauged and planed. Taping, masking and touch-up painting inside of cutaway horns. Noteworthy work in reassembly & set-up. Guitar Finished Work needed / suggested, work done, work I will do. ll Homepage ll Inventory Index ll |