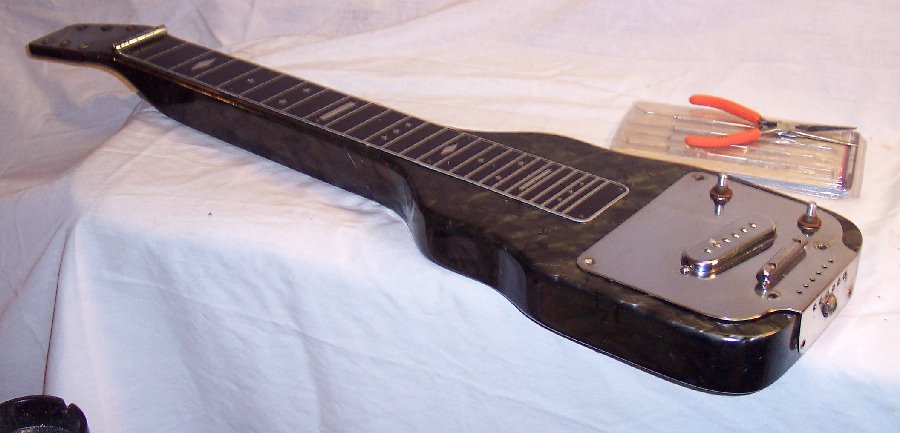
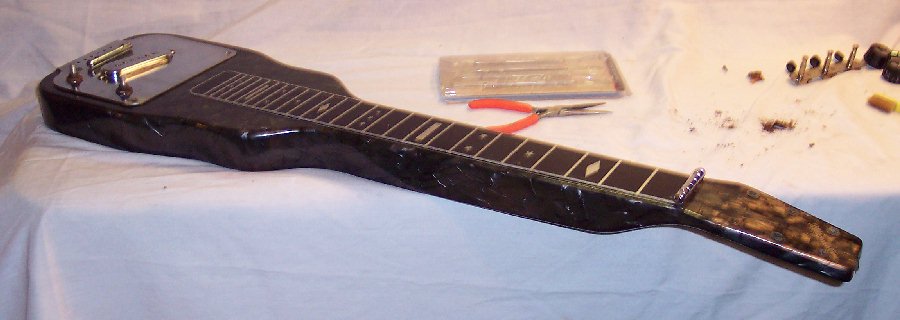
A pretty nice looking Steel Guitar; A bit of clean-up and she'll be just fine, .....right?
Yep, ...and nothing of substance caught my eye when I received and inspected this Steel externally and ops checked it a few years ago and then packed it back away for safe storage. Then I received an inquiry about this Steel so I pulled it out to give it a full detailed inspection and take some pictures, and to look closely at that "small burn spot" on the headstock the previous owner informed me it had and I noticed on initial shipping received inspection:
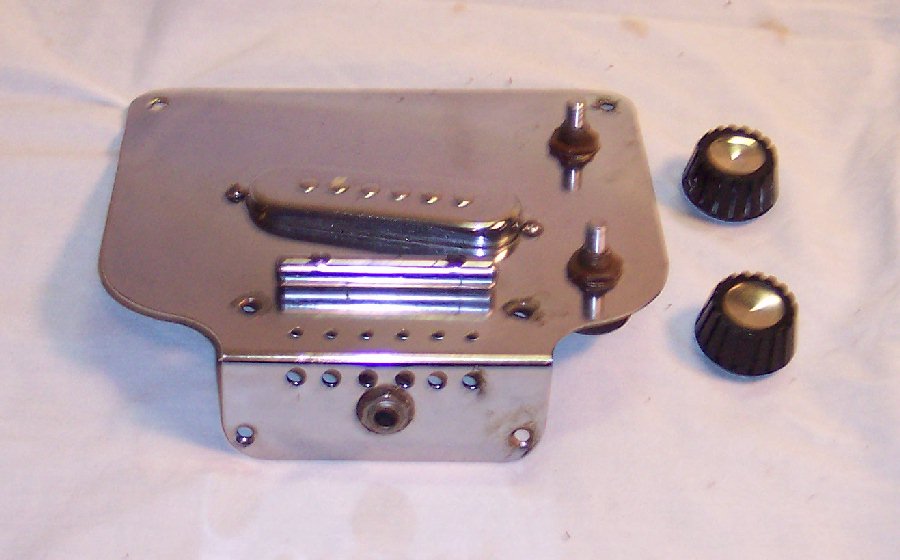
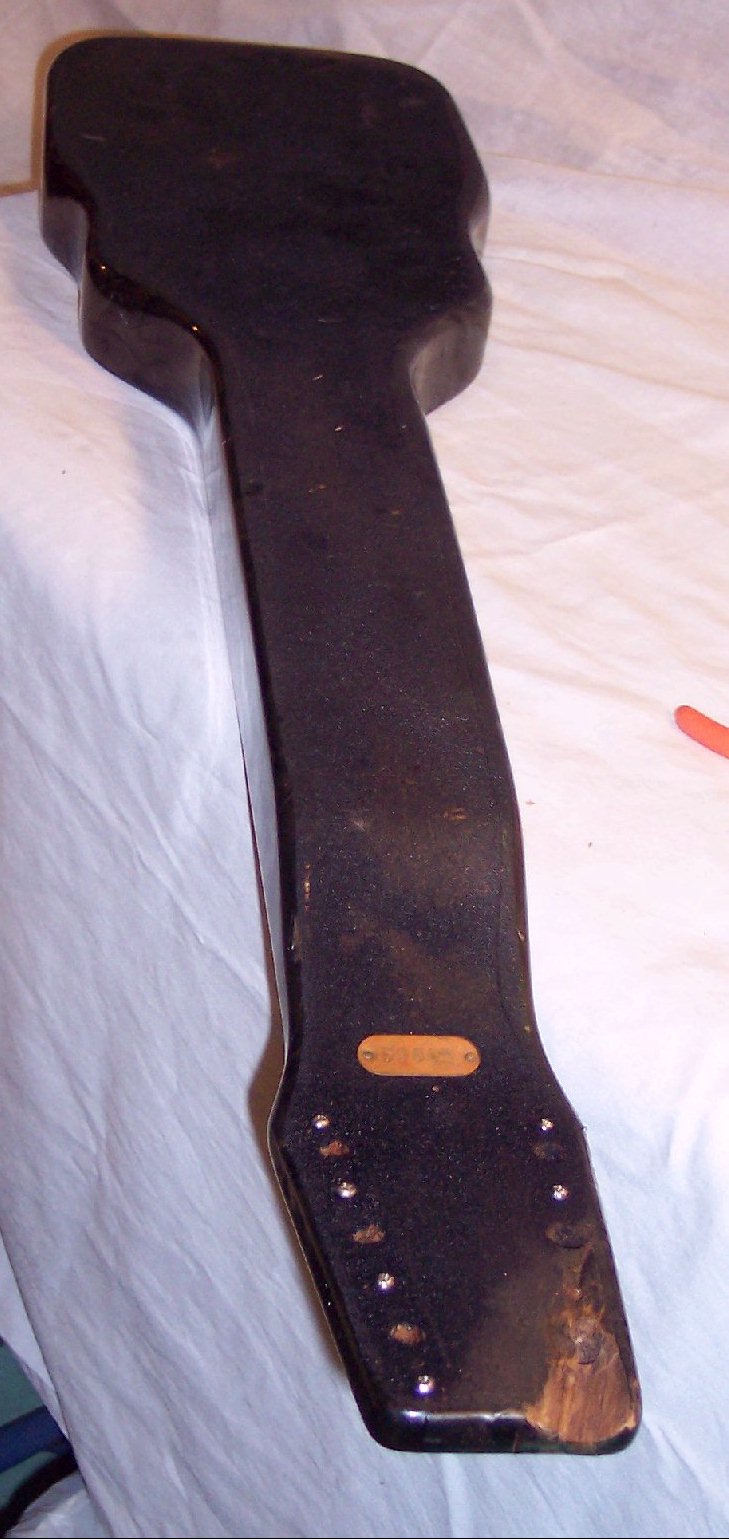
But hmmmmm......; When reinspecting the Steel for the customer inquiry, .....why are all the tuner knobs NOW disintegrated and why does the 4th string tuner's string shaft have a quite abnormal amount of on and around it, ...and so does it's ferrule, ...all of which didn't exist when I previously inspected it. Well, let's flip it over and take a look at the tuners themselves. Geeez, .....the treble side tuner strip is ate up with corrosion it didn't have when I packed it away a couple years ago, .....particularly around the 4th string tuner and spreading back down the strip and tuners, ....while the bass tuners strip looks almost new. Always reinspect something closely again before selling it if it's been packed / stored away for awhile.
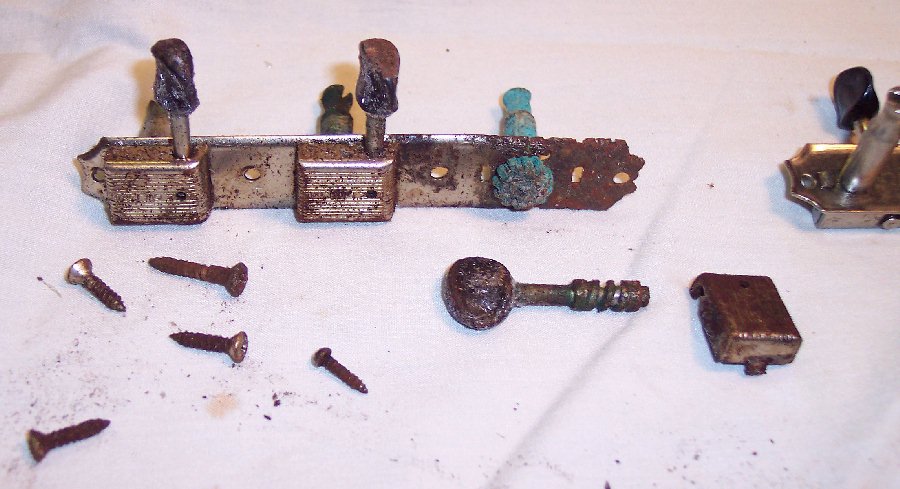
Hmmmmm ......strange indeed; Let's take the tuners off and see what's going on:
Yep, ...I've seen this before. The 3rd string tuner was a little tight so the 'ebayer' or associate decided to put some penetrating oil down into the oiling hole in the tuner cap, and put some down the string post as well. I can only hope that he / she didn't know that the penetrating oil he / she used was caustic / corrosive as some penetrating oils like PB Blaster are to eat their way into corroded metals they are designed for. ( READ THE ENTIRE LABEL of any substance you're gonna use on anything ...particularly a guitar). And it looks like 'E-bubba' used allot of whatever he / she used; And if a little is good then allot must be even better! So the caustic oil creeped along the trough the tuner strip afforded and right out along metal surfaces, again as the penetrating oil was designed to do. The oil's acid made the oil an electrolyte and everywhere dissimilar metals were in contact or close to each other a tiny battery effect was caused, eating up the metals by electrolysis ...and going right out onto the tuner buttons to eat their plastic too, as PB Blaster is famous for in it's P.R. demonstrations on a styrofoam cup.
Hmmmmm...... I wonder if this might have something to do with the burn spot that E-bubba reported???
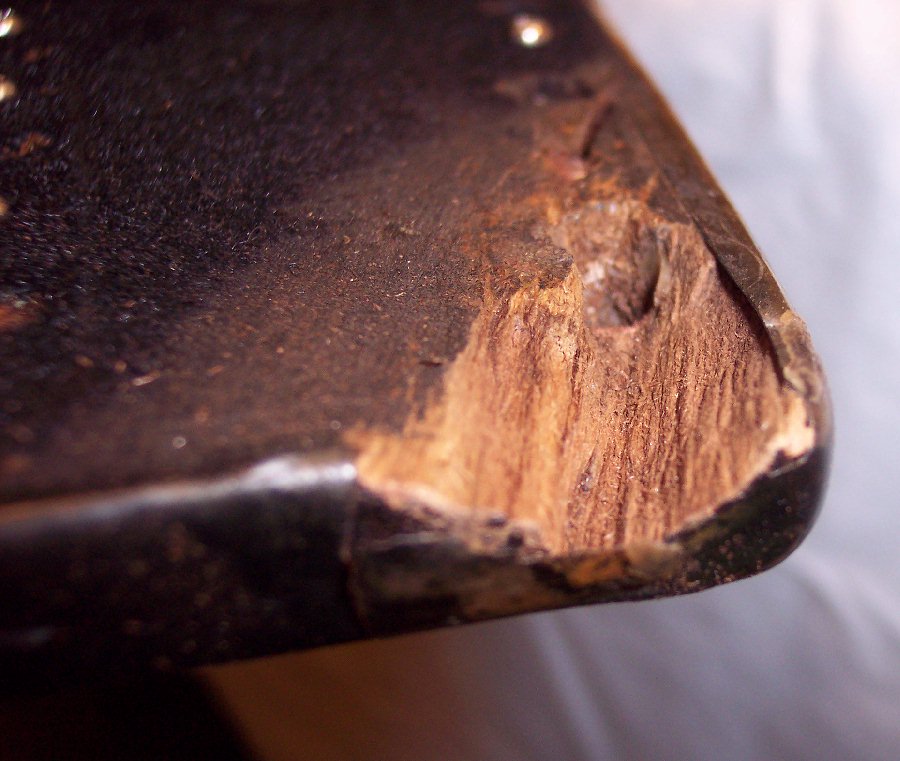
Well, looking at the "burn" spot closely it becomes evident that it is not a thermal burn at all, but is a chemical "burn"; And hey, it's been repaired trying to cover it up (as a repair should). The repair is some kind of plastic-like filler used like a putty and painted over ....and not a bad job for the limited knowledge the "repairman" had, but certainly not professional. Well, that puttly has gotta come out to see what was being repaired, and make it right; So I carefully dig out the "putty" right down to bare wood, and here's what I find:
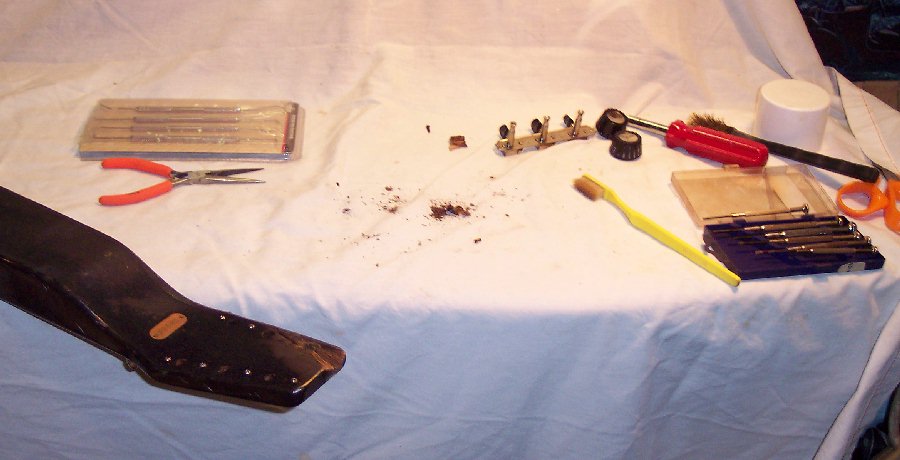
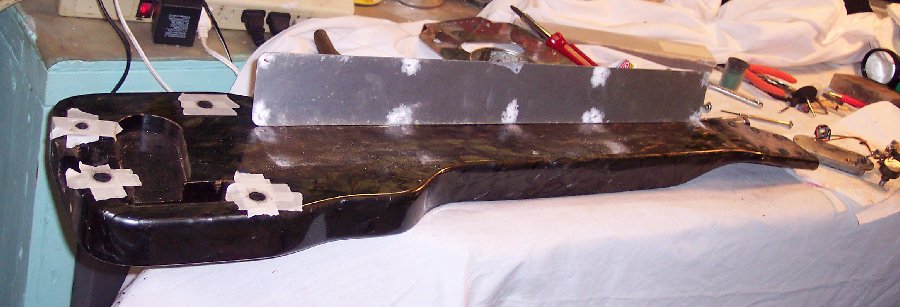
Notice that I have left the wood's grain matrix as rough as it exists under the rot, and not sanded down. This will provide plenty of tooth for my filler repair to grab onto and hold tight. Having gotten the putty and rot completely removed I then brushed on several wet coats of acetone to drive out any oil and moisture and leaving a dry and porous boundary in preparation for a sealer. I then applied clear acetone-based and thinned acrylic fingernail polish and worked it into the wood with a small quality artist brush kept wet with acetone. I applied 3 such coats, drying each one with a hand held hair dryer. Now the wood is completely sealed and primed for the acetone-based filler I will make. Having done this prep work, cleaned off any area that might have had some of the acidic penetrating oil residue, and thus stopped the deterioration; I can now pack this guitar away again for safekeeping while it waits in line for it's turn / time on my work-bench schedule:
Under the putty was about 3/32" layer of soft disentigrated wood. The "repairman" didn't apply a stop chemical treatment so the caustic oil did it's thang until it ran out of gas. I used jewelers flat-head screwdrivers as pry bars and as chisels to carefully lift the putty out and then raked along the wood's grain matrix. I then used a small brass wire brush to make sure that all the rot had come out right down to the good wood's grain matrix. I then applied a baking soda + water paste to neutralize any acid that remained, and brushed off the paste when it dried (it feeds it's soda water into the wood and then as the paste dries it sucks the water back out).
I took these pics just before the last of the embedded putty pieces had been taken out after being exposed by raking the rot out:
Here's some more improper-oil corrosion that I cleaned up:
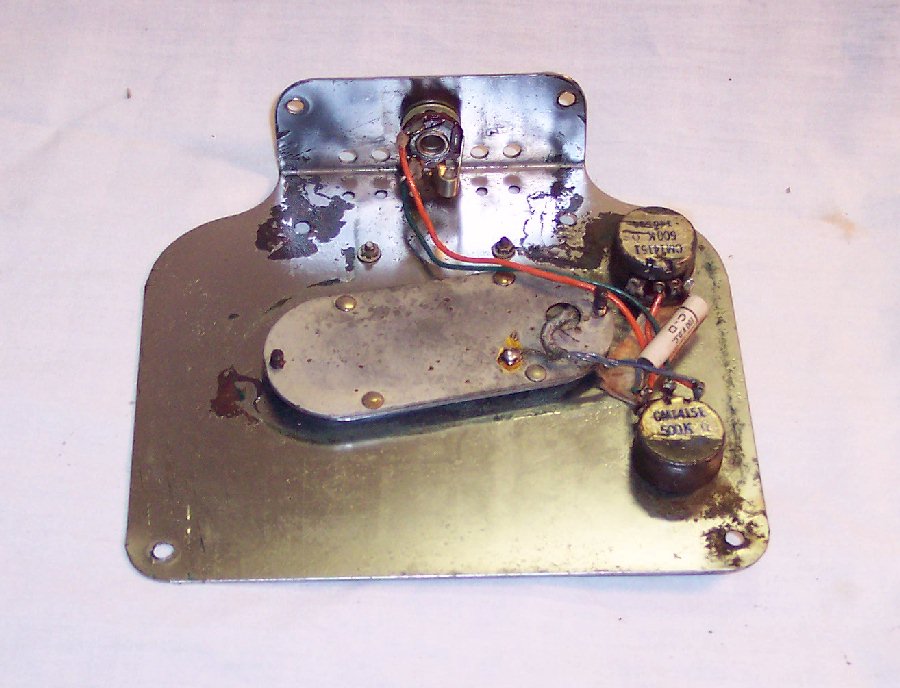
"E-bubba's" damage didn't stop at oiling the tuner; He was spiffing it up for sale. The penetrating oil would make "e-bubba's" hands sweat in reaction to the caustic oil. He removed the knobs to clean up the large metal electronics panel plate and, ...yep, spread around some more sweaty, salty, caustic oil. Everywhere "bubba" touched something on the electronics panel with his hands, the sweaty penetrating oil got on it and continued doing it's job penetrating away around and down the screws; Electrolysis shows on / at each one of those points. Bubba did eventually wipe the guitar down when he finished his work; Everything that was obvious outside anyway, ...but he probably had no clue at all that his caustic oil laden sweat had penetrated the screws holes and the interior of the electronics panel and guitar wood where the panel screws to:
So look what happened on the bottom side of the electronics plate, right where gravity and vibration carried the caustic oil down and around the screws; Notice the caustic oil didn't come down screws bubba's hands were not in contact with (screw holes in this image). It all cleaned up nicely but the cleaned off caustic oil's corrosion left it's marks:
I made sure that any of the caustic oil residue was thoroughly cleaned off, neutralized the corrosion, and applied VPCI corrosion inhibiting treatment to all metal parts. As bad as these pics look in sporadic spots, it is all cleaning up nicely, ....just the kind of fun I really enjoy. The pickup and pots work just fine.
And actually, ....let's have kind thoughts for "E-bubba" or "E-bubbette"; He / she most likely simply made a mistake with their thinking cap off (way off); And provided a fine example of a bad case scenario of what using the wrong kind of oil can do, especially when over-oiling, ...particularly if the oil is caustic, ...and a good lesson to all to READ THE INSTRUCTIONS and THINK OUT what we do. Murphy is always lurking!
I will archive the ongoing refurbishment & repair work on subsequent pages as time becomes available.
On an experienced hunch I lifted off the fretboard by gently prying it upward a tiny bit at a time at each brad point in rotation. Sure enough, Bubba's caustic oil had even worked it's way down past the fretboard brads and oxidized the bottom of the aluminum fretboard around the brad holes ...and most of every brad but one was completely eaten away. The slow leaching of the brass metals' oxides was absorbed by the wood while the aluminum oxide powder had no place to go so remained in place between the fretboard and body. The oxides are innocuous to the wood and MOTS:
NOTE: THIS GUITAR IS BEING REFURBISHED ON A CASUAL BASIS AS TIME ALLOWS. THESE WEBPAGES WILL BE UPDATED AS WORK PROGRESSES UNTIL THE REFURBISHMENT IS FINISHED AND ARCHIVED HERE.
How NOT to oil a guitar !
These pages are a work in progress documenting the repair / refurbishment of this steel guitar. The texts herein might not be complete and congruent until all the text is compiled and posted here. I think this repair work is interesting and worthy of documenting because of the unusual repairs to be done, ...and I can also show the several steps involved in making a very convincing finish to replicate MOTS that has been damaged. Feel free to look, but expect some incomplete info until all of the pics and their text is done and posted.